Easy to Draw a Full Page of Fire Easy to Draw Realistic Fire
Since the dawn of mankind, fire has fascinated us as both a valuable resource and sometimes a destructive force that can take down civilizations.
We've long been drawn to the warmth that fire provides and the beauty on display as it flickers in front of us.
If you've been similarly fascinated and captivated by the mysteries of fire, then perhaps you've wondered whether you could learn how to draw fire.
If this sounds like you, then you're looking at the right guide!
We created this step-by-step guide on how to draw fire in 6 easy steps to make sure that learning to draw fire won't burn you!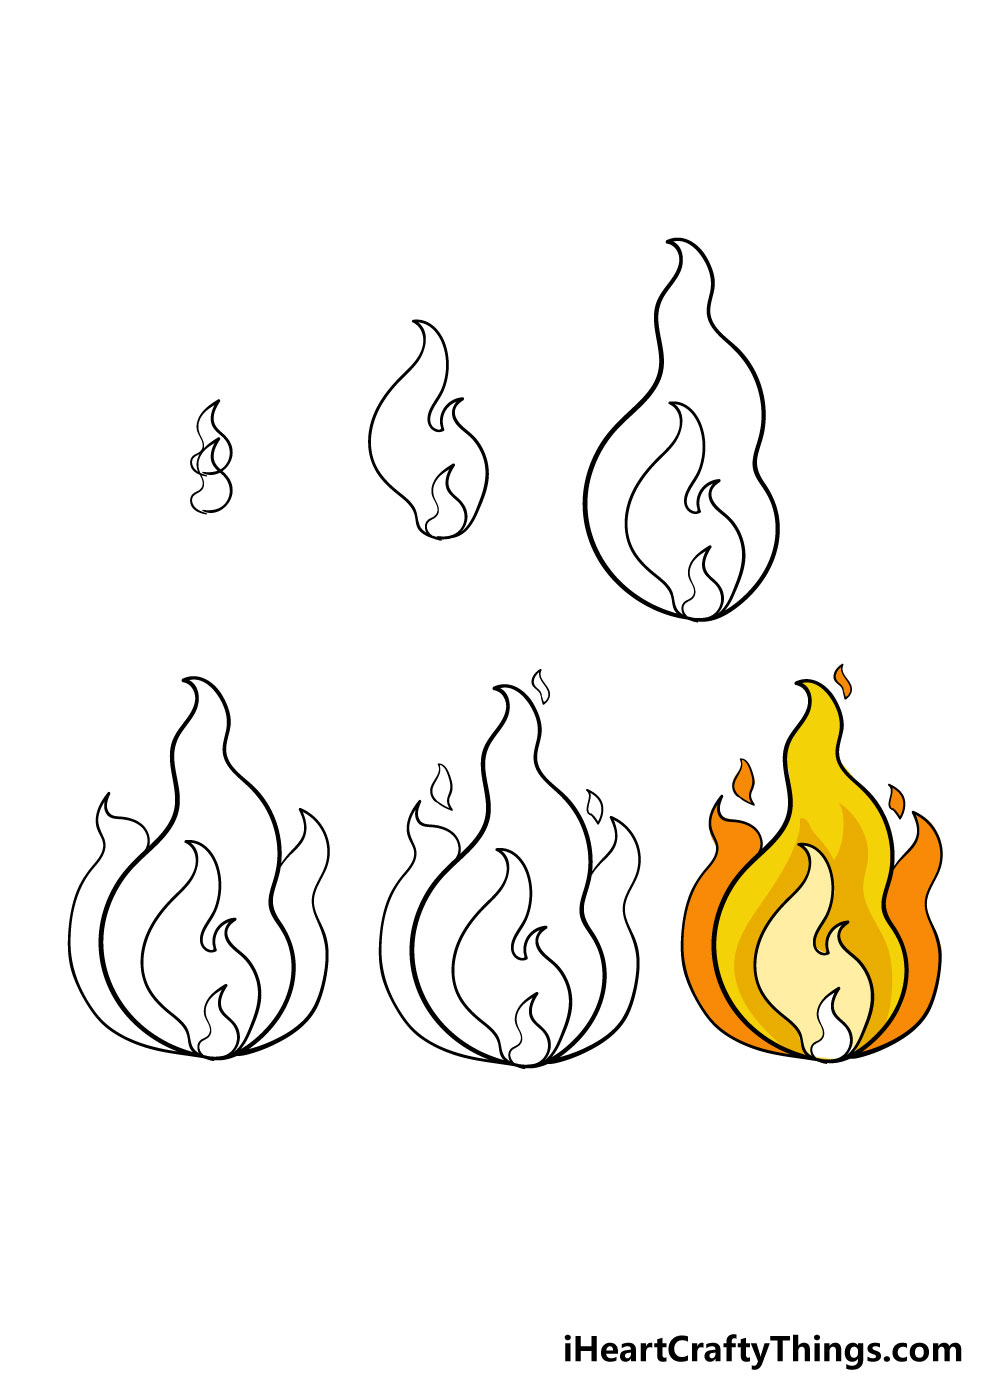
What's in this Blog Post
- How to Draw Fire – Let's get Started!
- Step 1
- Step 2 – Next, draw in the next layer of the fire
- Step 3 – Now, draw in the next layer
- Step 4 – Next, draw in the sides of your fire
- Step 5 – Add in some final details
- Step 6 – Finish it off with some color
- 5 Tips To Make Your Fire Drawing Even Better!
- Your Fire Drawing is Complete!
How to Draw Fire – Let's get Started!
Step 1
For the first step in our guide on how to draw fire, we will be starting small and building up layers from there.
For this part, we will be drawing in a curvy lined shape that looks a little bit like a tadpole. It may not look like much now, but this will be forming the center of what will soon be a magnificent flame drawing!
Step 2 – Next, draw in the next layer of the fire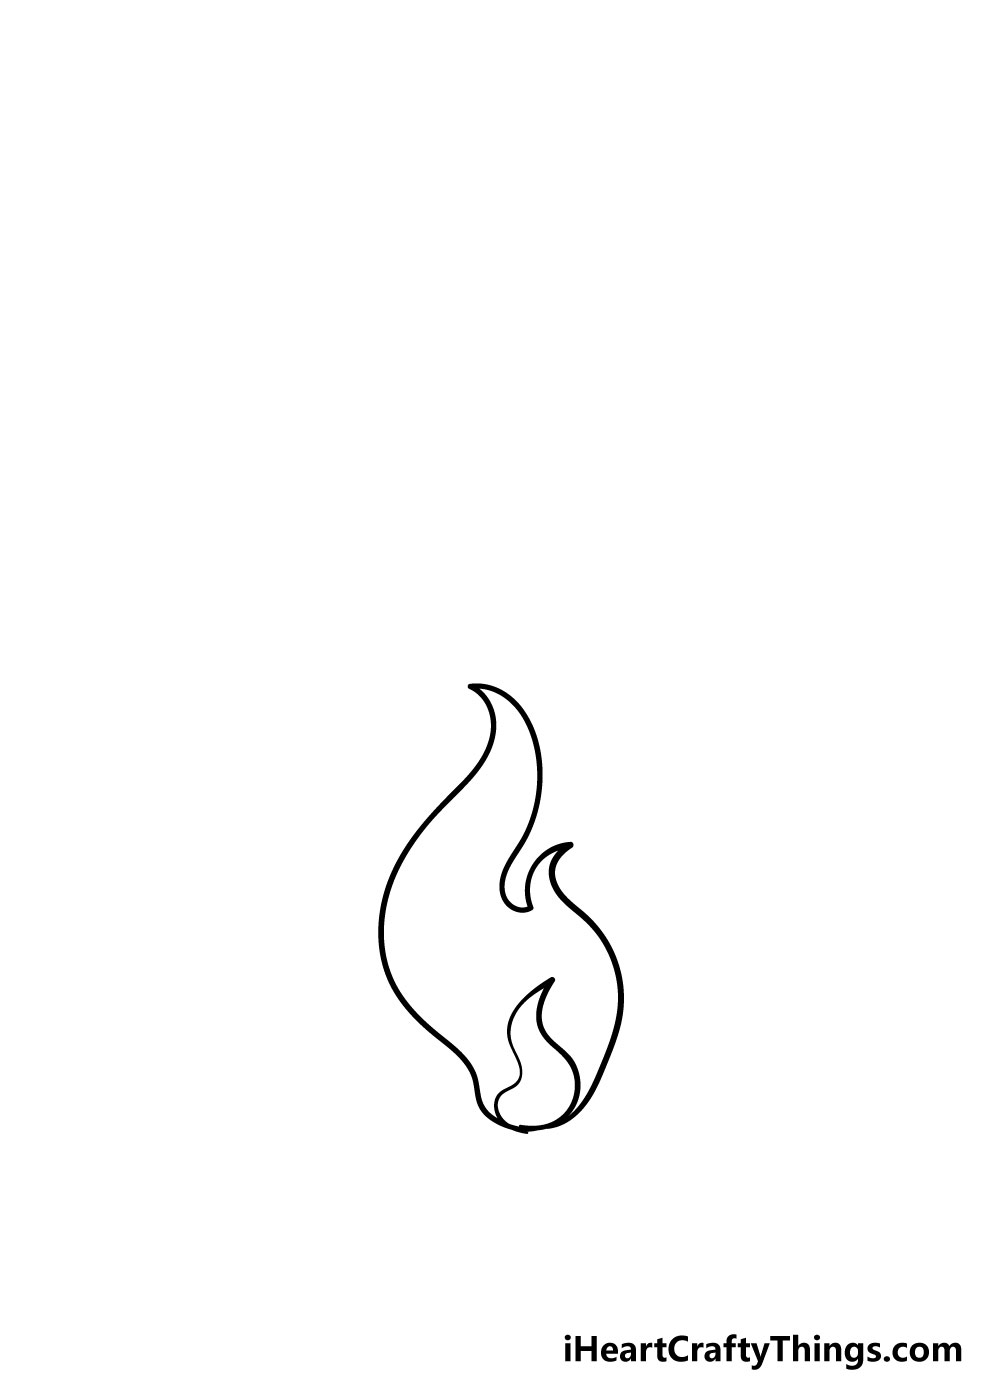
For the next step of your fire drawing, we will be adding in another layer of the fire. This layer will be larger than the first one, and it will also have a lot more shape to it.
Using the reference image as a guide, you can see how there are some pointy sections to go along with the wavier lines. This will help it to look like the fire is flickering like a real fire would be!
Step 3 – Now, draw in the next layer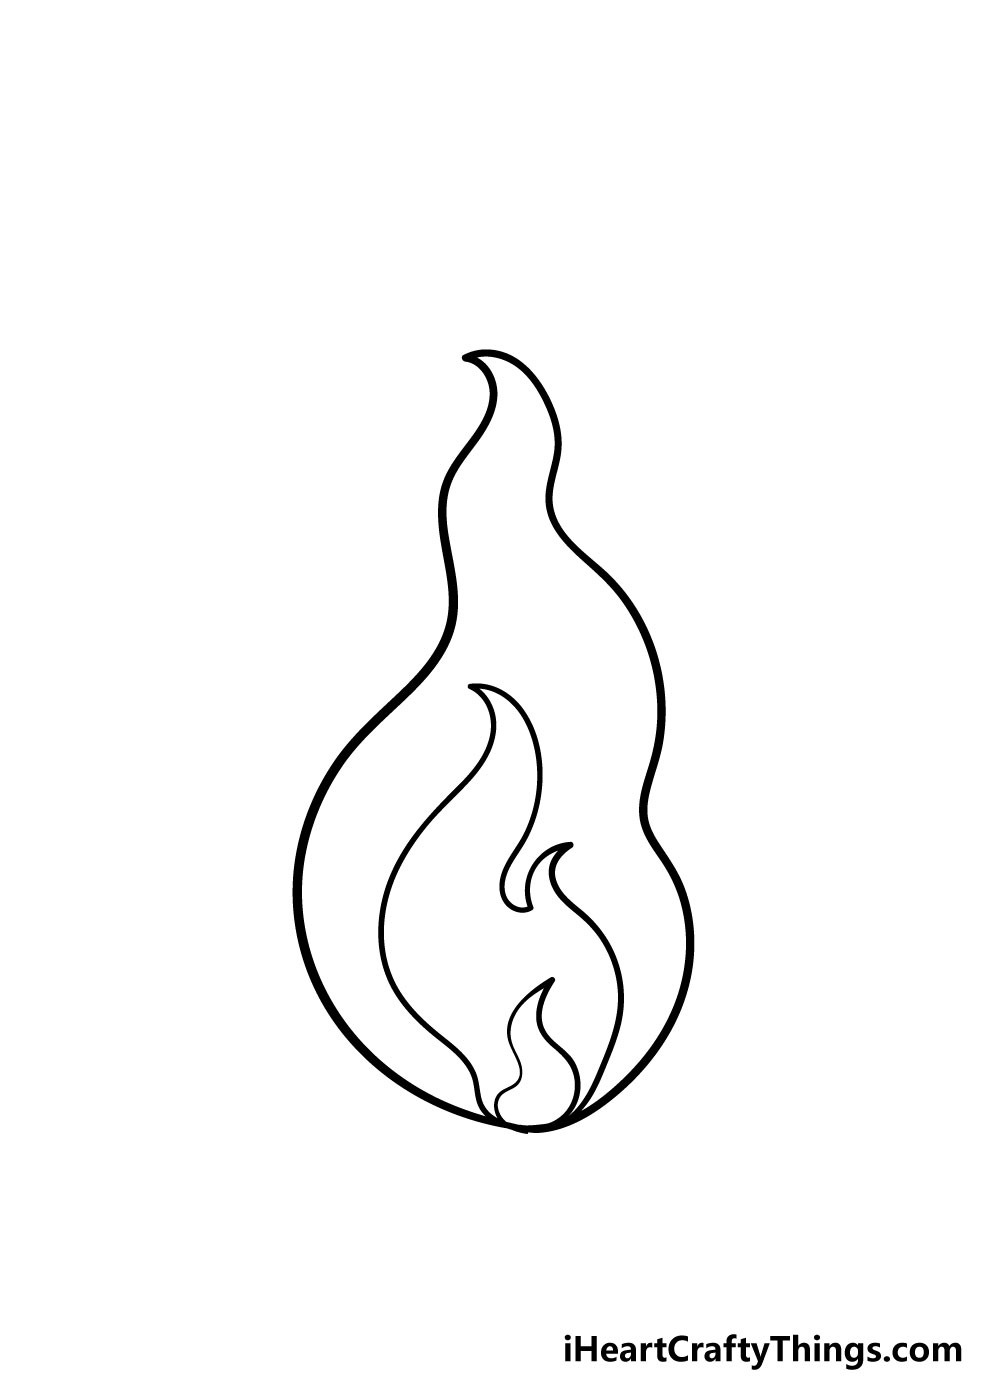
In step number 3 of this guide, we will be adding in the largest layer of your fire drawing. This layer will form the same basic shape of the previous one.
The main difference is that it has fewer sharp aspects to it and is much more rounded. As you can see now, it's starting to look a lot more like fire as we start to add more layers!
Once you have gotten the hang of drawing fire, you could put your own spin by varying how the layers look.
You could make some layers more rounded, less rounded, have more sharp points or flow in different directions for different looks.
Step 4 – Next, draw in the sides of your fire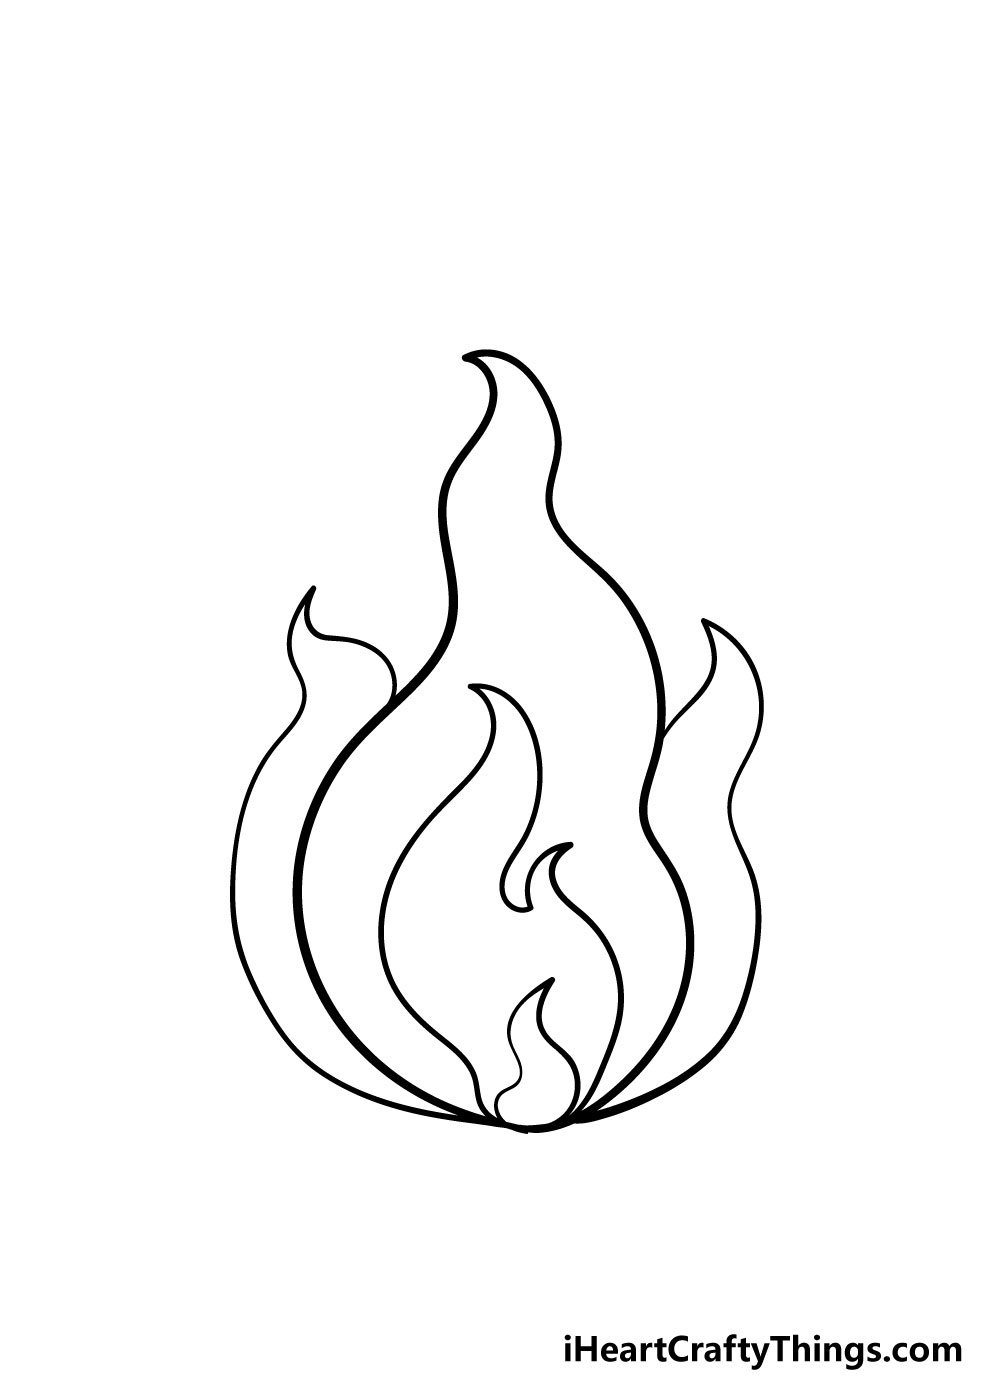
It's already looking like a healthy fire at this point, but it needs a bit of depth to it, so we will be taking care of that in this step.
To do this, we will be adding in two more flames to the side of your fire drawing.
Starting from the outer base of your fire, carefully draw in two side parts that are very pointed at the top.
You can draw these in exactly as they appear in the picture, but don't be afraid to change the shape of them a bit, as fire never looks the same from moment to moment!
No matter how you do it, know it will look really great.
Step 5 – Add in some final details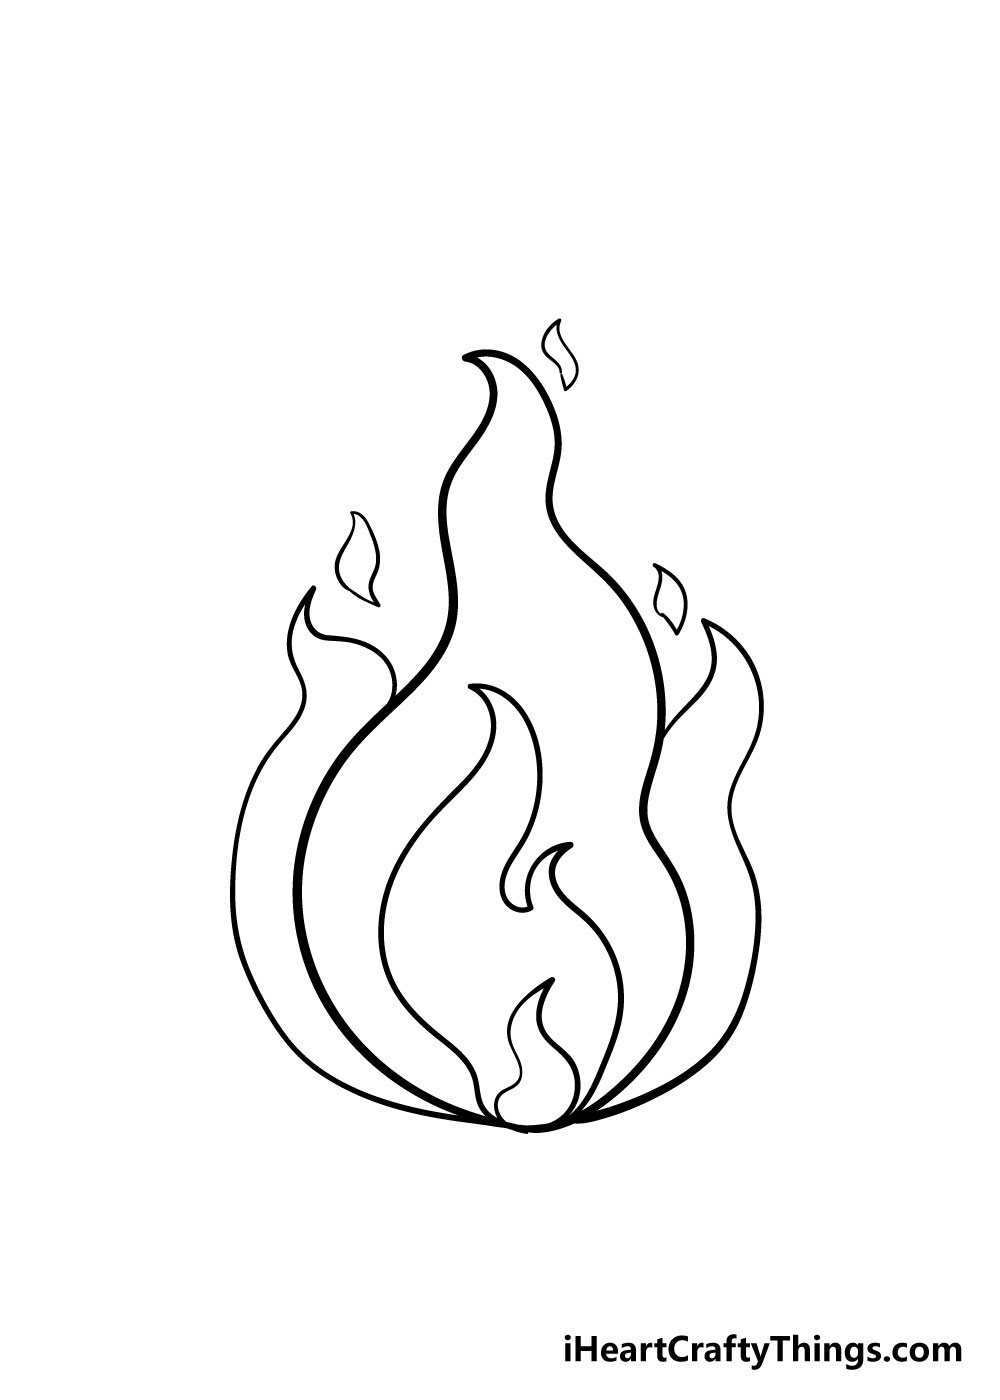
Your fire drawing is almost complete, and just needs a few final details! For this step, we will be adding in some small flickering details.
To do this, you can draw in a few shapes that are similar to the very first shape you drew in step 1.
You can position these as they appear in the picture, but you could also change up the placement in a way that looks good to you.
There's no right or wrong way to add in details like this, so you should definitely feel free to experiment and add in your own touches!
Step 6 – Finish it off with some color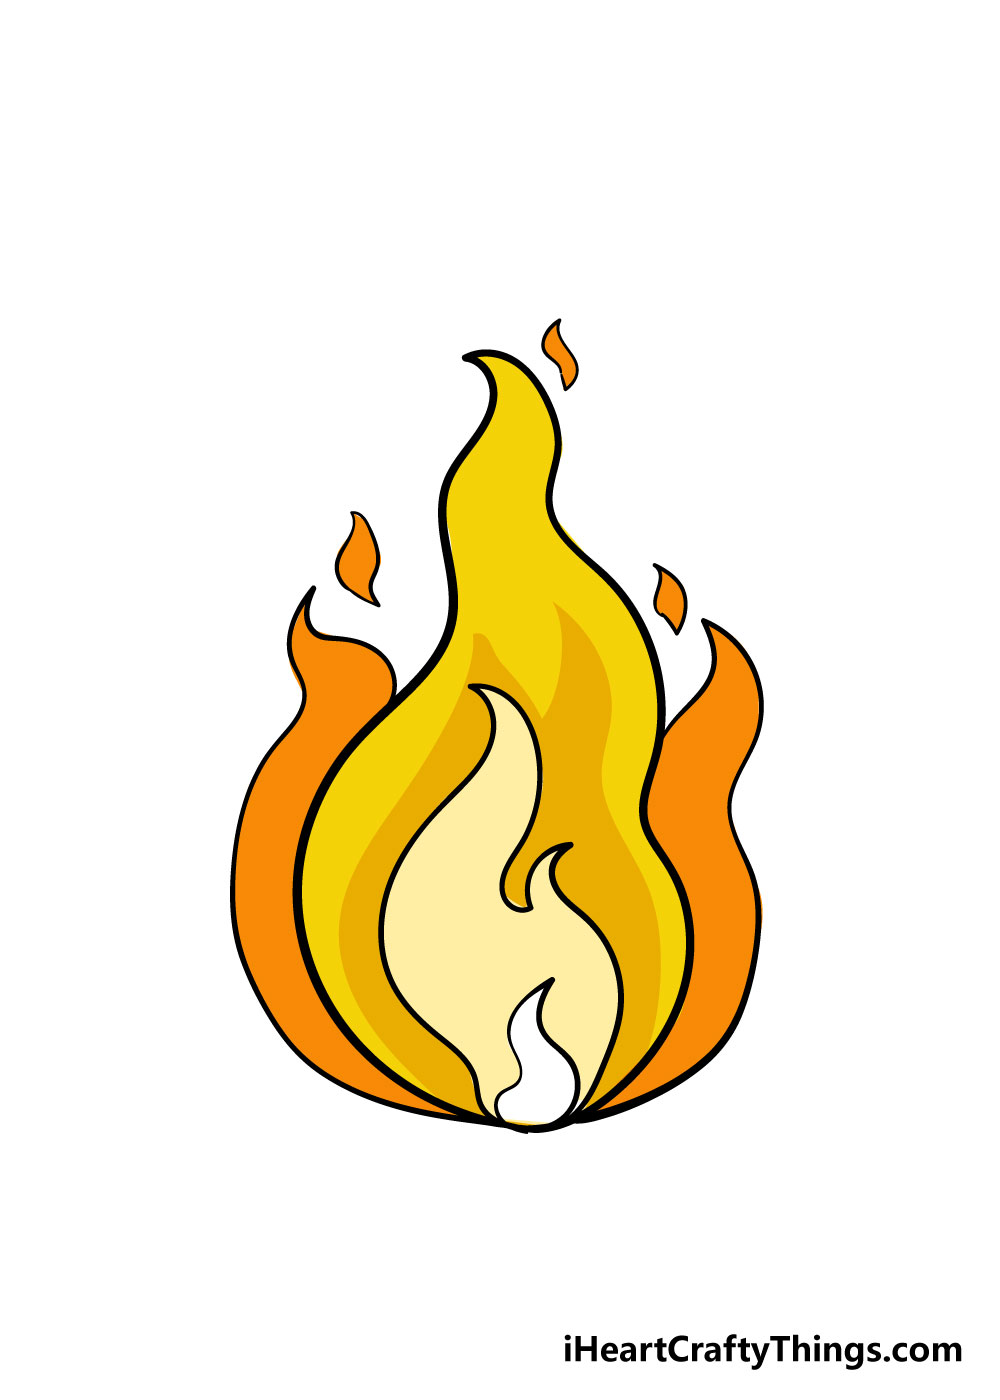
With these last details added in, you're almost finished!
I'm sure you can see how adding the various layers and details made your fire drawing come together, but it still needs one more thing to be truly complete.
This might be the most fun of all the steps, as now step you get to express your creativity with your colors!
We've shown one way you could color it in, but you should let your imagination run wild when coloring in your fire drawing.
Whether you stick to yellows, reds and oranges for your fire drawing or decide to incorporate some of your other favorite colors, there are so many ways you can color it in!
It can be a lot of fun to experiment with different mediums for some unique color variations.
Some examples could include acrylic paints, watercolors and colored pens as some mediums you could use.
I think that watercolors especially would be perfect for this, as they can give an image a much softer look.
What do you think you will use to color in your awesome fire drawing?
5 Tips To Make Your Fire Drawing Even Better!
Make this fire sketch pop as we show you some ways to make it even easier!
We kept the focus on the flames in this fire drawing in order to make it easier to learn. Fire needs fuel to burn, however, and that brings us to our first suggestion!
You could show what the base of this fire is made of with some simple details. It could be a pile of sticks and kindling, or you could have a pile of small logs.
What else do you think could be used for the fuel of this fire?
Once you've created the base of this drawing of a fire, you can then create a fun background setting for it! There are so many fun scenes you could create.
For a few examples, it could be a campfire where campers are sitting around while roasting marshmallows. Or, this could be a fire in a fireplace on a cold Winter night.
What other settings do you think this fire could be used for?
Using this fire sketch for some settings is an idea, but you could also get a bit more stylistic with it. For example, maybe you could use the flames to make a word or maybe a logo.
There are so many fun things you could use the fire for now that you know how to draw it!
When creating a picture of fire, colors and art mediums can be your best asset. Fire has no physical form, so you could use some watercolors or colored pencils to make the colors look soft and transparent.
If you would prefer brighter colors then that would look great as well!
Finally, using some crafts and unusual elements could take your drawing of fire to whole new levels. For instance, in the first tip we mentioned having some sticks at the base of the fire.
You could go to your yard or a park and find some small twigs, break them up and then glue them to the base of the fire for a 3D effect!
Your Fire Drawing is Complete!
We really hope that this step-by-step guide on how to draw fire in 6 steps was fun and helpful for you to use!
Whenever you're learning how to draw something new, the best approach is always to break it down into stages.
When creating this guide, our aim was to do just that, so that you can learn how to draw a beautiful fire while making it easy enough for you to have fun with it!
You can also personalize your fire drawing with some details as well. You can use your own colors, draw in different shapes for the various layers of the fire or add in some extra fun details.
Maybe you could add in some wood below the fire or have some marshmallows on sticks poking near the flame!
You could also create a pretty background with some colors. For example, you could use a dark blue with dots of yellow for the background to create a wonderful nighttime scene.
The only limit is your imagination, so let your creativity take over as you finish your fire drawing!
We will be uploading lots of new drawing guides such as this one, so be sure to check our site out frequently to never miss out on the fun!
Once you've drawn and colored in a beautiful fire, we hope that you will share it to our Facebook and Pinterest pages for us to admire!
We always love to see your amazing and colorful creations, and we can't wait to see your awesome fire drawings!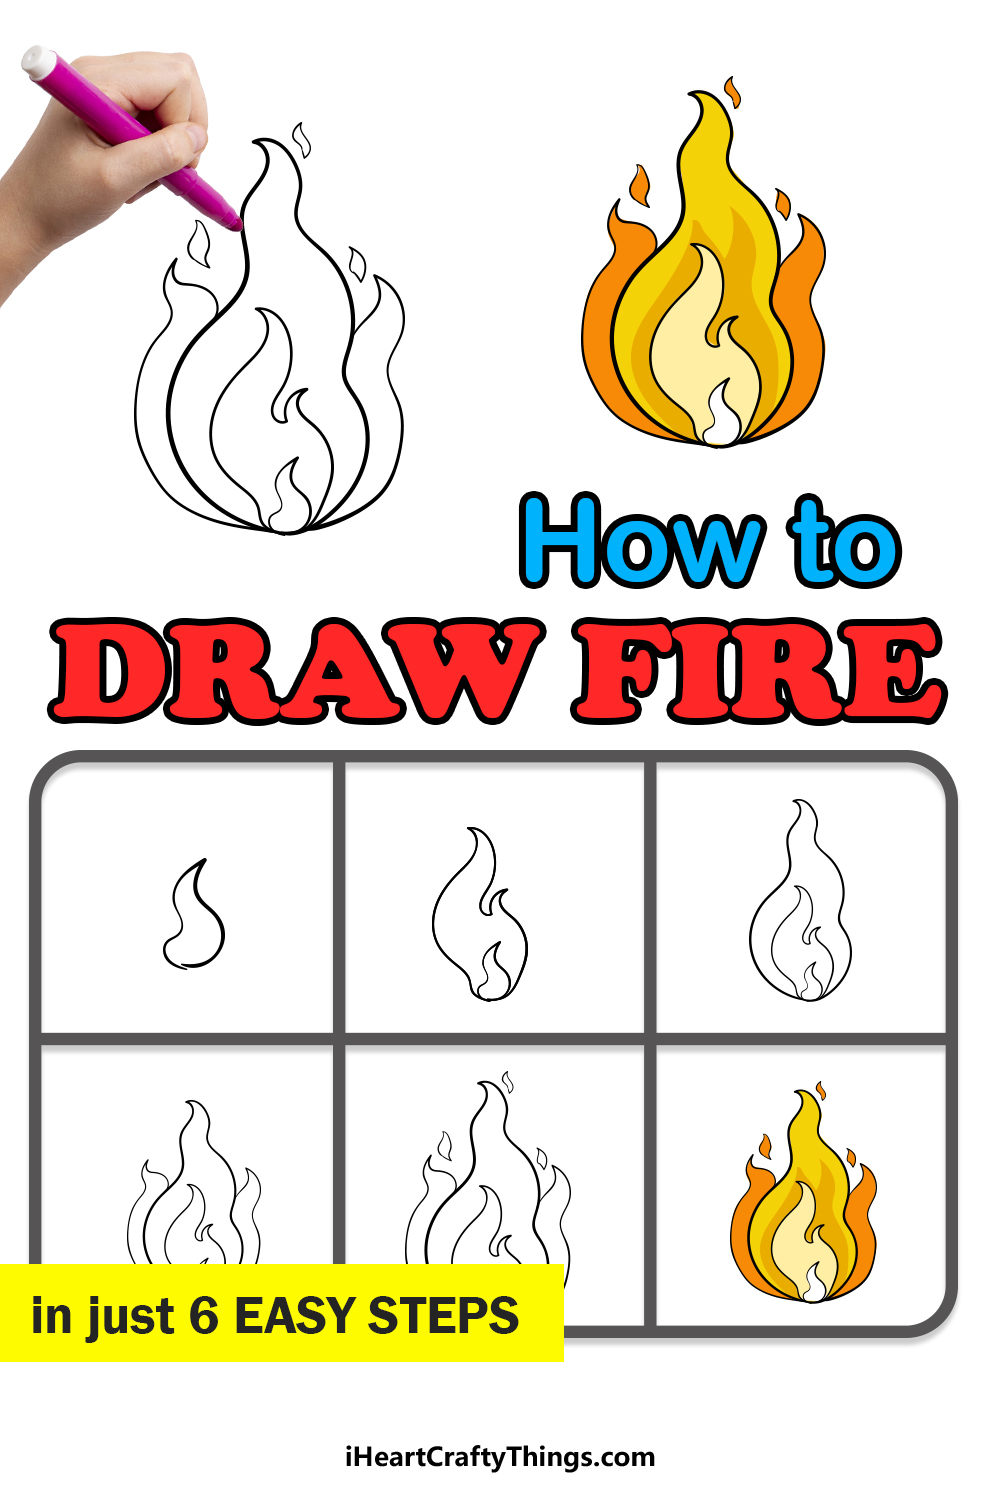
Source: https://iheartcraftythings.com/fire-drawing.html
0 Response to "Easy to Draw a Full Page of Fire Easy to Draw Realistic Fire"
Postar um comentário